

Floral Design with Cara: How to Extend the Life of Cut Flower Arrangements
By Cara Ewald on August 15, 2014 from Floral Design with Cara
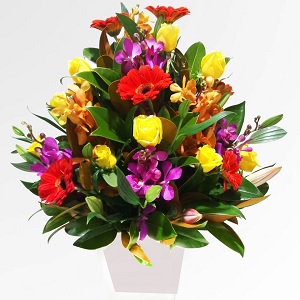 Whether you cut them from your own garden or you receive a flower arrangement from a local florist, flowers don't have to be here today and gone tomorrow. Many people see cut flower arrangements as a waste of money, but it has been proven, time and time again, by many scientific studies that the presence of real flowers in a home make people very, very happy. Happiness is important, and today I am going to spotlight how to extend the life of your cut flower arrangements, and ultimately your happiness with a few simple steps.
First things first, upon receipt of the flowers, check the container to see if there is enough water in it. The flowers continually 'drink' water, check them every day, and add water as necessary making sure that the end of every stem is in water. Upon checking the flowers, feel the bloom to see if it’s stiff and not floppy. If the bloom is stiff, you are in good shape. If it is floppy and has brown ends, you might want to toss it. Recut the flowers every third day to ensure your flowers properly drink. To ensure overall look of the arrangement, you may want to rearrange your flowers and change the water and container completely, especially if the water is looking brown and murky. To change the water, you must have another container or bucket of water at your disposal. Remove the flowers carefully from the existing arrangement, careful not to pull the bloom off the stem. Cut each flower on an angle, being careful not to smash or damage the stems. Avoid cutting them too short, because they ultimately need to be long enough to reach the water in your chosen container. A sharp pair of scissors or garden shears will do the trick. Place them in the temporary vase, and leave them for a few hours to allow them to drink water.
Dump the old water out of the original container, and clean it with hot soapy water first, and then a little bleach to disinfect and kill any 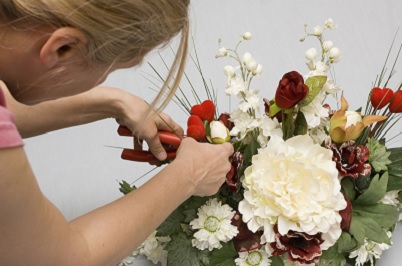 lingering bacteria. Fill the container with water and some flower food. Flower food can be purchased online, and I recommend it over home brewed concoctions. If you do not have access to flower food, a few drops of original bleach can be used. This will help keep bacteria to a minimum. Prior to placing the flowers, dry the top and outside of the container with a paper towel. Then make a grid of tape with 1" by 1" openings on the top of the container, and one line of tape around the container catching the ends of each strip of the grid. Press the tape down against the container, to insure a tight seal so that water does not get under the tape. If water gets under the tape, your grid will not be stable and your arrangement will move slightly.
lingering bacteria. Fill the container with water and some flower food. Flower food can be purchased online, and I recommend it over home brewed concoctions. If you do not have access to flower food, a few drops of original bleach can be used. This will help keep bacteria to a minimum. Prior to placing the flowers, dry the top and outside of the container with a paper towel. Then make a grid of tape with 1" by 1" openings on the top of the container, and one line of tape around the container catching the ends of each strip of the grid. Press the tape down against the container, to insure a tight seal so that water does not get under the tape. If water gets under the tape, your grid will not be stable and your arrangement will move slightly.
Now, the fun begins. Start making your arrangement. Recut your stems on an angle again, making a clean cut. Place larger blooms and shorter stems near the edges of the container, while taller shorter blooms should fill the middle of the container. Be creative. Cut some branches from a tree to add height and depth to your arrangement. Most importantly, enjoy your flowers for much longer than usual. After all, flowers really do equal happiness.


Leave a Comment
Log in or create an account to post a comment.